Creating a DIY Security System with Wink
One of the main benefits of having a smart home is that you can use it to amplify your home’s security in new and meaningful ways. It doesn’t require expensive, professional installation or the monthly fees common to many third party security providers. With a few products and a baseline knowledge of the different features available in the Wink app, you can quickly and easily create your very own DIY security system. In this post, we’ll outline a few common security use cases, along with the products and setup instructions to get started.
1: AUTOMATE LIGHTS SO IT LOOKS LIKE SOMEONE IS HOME AFTER DARK
If you’re someone who regularly works late (or has a very active after work social life), it’s likely you’re pulling into the driveway or walking into the apartment after it gets dark. With Wink, it’s easy to create the illusion that someone is always home.
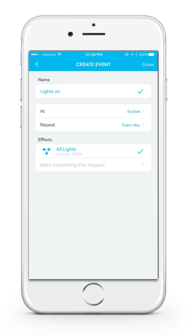
Within the Wink app you can create Schedules that prompt single (or multiple) lights to turn on and off at predetermined times. You can also sync a Schedule with Sunset, so that regardless of changing daylight hours throughout the year, Wink will always turn on a porchlight or living room lamp at dusk.
What you’ll need:
- One smart light bulb (or multiple, depending on the size of your home)
- One Wink HUB (if required to connect your light bulb with the Wink app)
How to get started:
- Check out our blog post on how to setup a Schedule for in-depth instructions here.
2: CONTROL WHO IS ENTERING AND LEAVING YOUR HOME
Our homes can be a zoo of activity with people constantly coming and going. While you can hand out keys to friends and family, a few smart products and the Wink app can make it much easier to not only see from afar who is at the front door, but when they’ve arrived and left.
The Ring Video Doorbell and a smart Schlage lock (multiple models available) enables this. Within the Wink app, you can create a Robot that notifies you whenever Ring is triggered or when motion is detected (the sensitivity of the motion detector can be changed based on environmental factors near your front door). From there, you can see who is at the front door and if you have a Schlage lock installed, either unlock the door remotely to let the dog sitter, or ignore the pesky salesman and go back to your day.
What’s more, with a Schlage lock you can create separate user codes for the individuals you want to grant access to your home. Once the codes are established, Robots can be created to notify you when a particular user code is used. The activity feed of the Wink app will show you who and when someone comes or goes, so you can breathe easier.
What you’ll need:

- One Ring Video Doorbell
- One Schlage Z-Wave Lock
- One Wink HUB
How to get started:
- Create a Robot to send you an email and push notifications when Ring is triggered or detects motion. For step by step instructions on setting up a Robot, check out our blog post here.
- Create another Robot for when your Dog Sitter’s user code is entered.
3: SURPRISE AND WARD OFF Possible INTRUDERS
In the unlikely and unfortunate instance that someone enters your home that you don’t want there, automating a few sensors and smart lights might just surprise them into running away.
GoControl’s security suite comes with door and window sensors you can affix anywhere, and monitor their status accordingly through the Wink app. The motion sensor identifies movement up to 50 feet away, while the loud siren and flashing light warns intruders if the alarm is tripped.
Say you’re going on vacation for a few weeks. Within the Wink app, you can set up a Robot that triggers your smart light bulbs to automatically illuminate if the motion sensor detects movement or the front door sensor is triggered. Take it the extra mile by having the siren go off as well. You’ll get alerts automatically on your phone so you can jump into action and investigate.
What you’ll need:
- One GoControl Premium Home Security Suite
- One smart light bulb (or multiple, depending on the size of your home)
- One Wink HUB
How to get started:
- Create a Robot for when a door opens, turn on the lights and trigger the siren.
- Create one Shortcut that enables the Robot and one that Disables the Robot. You can find step by step instructions for using Robots and Shortcuts together here.
- Create a Widget for each Shortcut. Instructions for creating a widget can be found on the bottom of the Shortcut blog post here.
